Monday, February 28, 2011

Oatmeal Peanut Butter Chocolate Chip cookies, oh my!

Our trip to the Great Harvest Bread store left me craving for peanut butter chocolate chip cookies.  Thank goodness they are about 50 minutes away otherwise I would have gone back for seconds.

Mr. J swore the sign by this particular cookie said flourless.  I was not convince based on the texture and appearance of the cookie that it truly was flourless.  I tried to do a quick google search and this is what I found.  Great Harvest uses (for the most part) a pretty basic cookie recipe and they always use whole wheat flour.  I tried to find some recipes online but they all seemed a bit off.  I definitely do not want a cookie described as crispy.  And most of the recipes did not have any oatmeal; the ones that did only had a small quantity.  


What we came up with was not the Great Harvest cookie, although it was close.  It was however delicious, gooey, and very peanut buttery.  Now I have another chance to practice self restraint all week.  Perfect!

Oatmeal Peanut Butter Chocolate Chip Cookies
adapted from BrownEyedBaker
Makes about 16 cookies
Ingredients:
1 cup whole wheat flour
1 teaspoon baking soda
¼ teaspoon salt
1 stick (½ cup) unsalted butter, at room temperature
½ cup creamy peanut butter
½ cup granulated sugar
1/3 cup light brown sugar
½ teaspoon vanilla extract
1 egg
1 cup rolled oats
1 cup semisweet chocolate chips

Directions:
1. Preheat oven to 350 degrees F. Line two baking sheets and set aside.

2. Whisk together the flour, baking soda and salt; set aside.

3. On medium speed, cream together the butter, peanut butter, granulated sugar, brown sugar and vanilla extract, about 3 minutes. Add the egg and beat to combine. On low speed, gradually add the flour until just combined. Stir in the oats, and then the chocolate chips.


4. Use a large cookie scoop and drop dough onto prepared baking sheets about 2 inches apart. Bake for 12-15 minutes, or until the cookies are lightly golden. Cool completely on the baking sheet and then store in an airtight container at room temperature. 

Sunday, February 27, 2011

Introducing my new friends

Saturday Mr. J and I set out on a mission to go to Hartford.  There are some things I don't like to live without.  Some of these things are not anywhere on the Connecticut shoreline unless I go way close to NYC.  Thus, we go to Hartford.  We almost didn't go because of the sickening gas price increase but like I said there are some things I don't like to live without.  The most important part of our trip was to visit the one and only Great Harvest Bread in Connecticut. 

I lived on homemade bread through high school.  When I first went to college I unwillingly went on the Atkins diet because I thought the store bought bread was gross.  I have slowly adapted but I prefer homemade bread, the GOOD homemade bread.  So I would like to introduce you to:

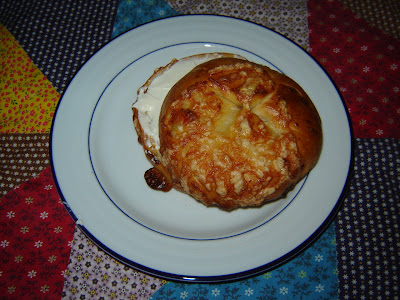
Mr. Stuffed (Cheddar) potato bread


Mrs. Whole wheat bread


It is so good!  I cannot even begin to describe the goodness of the bread.  It is a billion times better than store bread.  I am tempted to hide a bit to make it last longer.  A day later and they are both half gone.  It is very sad. 

We also got a Monster cookie.  It was oatmeal, peanut butter and chocolate chip.  We ate it on the ride home so all I have to show is the wrapper.  It was one good cookie and inspired me to try and recreate it for my cookie of the week.  Yes, my cookie addiction has come to making a different cookie each week.


I stopped by William Sonoma for a few gadgets.  We got a few more peelers and a pastry blender.  The other day when I was making the stresuel for the Cinnamon Baked French Toast I realized I didn't have one.  I actually think I HAD one at some point but in the move from my parents to on my own my mom inherited.   This has happened to more than one of my tools but I forgive her.


I upgraded my weights from 1lb to 5lbs.  I have recently been using canned pumpkin which falls somewhere in the middle.  I just didn't like the width of the can.  It was a bit much for my hands.  I like how they are pink and purple! 


Weekly workout wrap up
Monday: 45 minutes elliptical, sit ups
Tuesday: 5 minute warm up, 7 minute run (increasing speed)/1 minute walk for 40 minutes, 5 minute cool down
Wednesday: 60 minutes elliptical
Thursday: 10 minute warm up, 3 miles, 10 minute cool down
Friday: Cardio blast DVD
Saturday: 10 minute warm up, 3 miles, 10 minute cool down, weights
Sunday: 5 minute warm up, 4 miles, 10 minute cool down

Friday, February 25, 2011

Making it as a vegetarian

I felt a bit lazy this week so I suggested that Kari over at Jogging with Fiction write a guest post.  I am always trying to think of ways to sneak in vegetarian meals into our weekly routine.  The problem being is Mr. J is a big man who likes meat and potatoes.  Here is what Kari has to say...


When Emily asked me to guest blog on Life on Food. I wasn't sure what I'd talk about since I'm more of an exercise/everyday events-type blogger. I just put a loaf of my fantastic banana bread in the oven, though, so I figured now was as good a time as any to start writing.


I'm a married, twenty-something vegetarian married to Mike, a non-vegetarian. One of the biggest hurdles in Mike and my marriage is what to eat. Raised in a home where dinner isn't considered a dinner unless meat is involved, I've had to get creative.

On top of trying to create filling man meals, both Mike and I are avid runners. Right now, I'm in the midst of some serious marathon training. You definitely work up a serious appetite running over 50 miles as a week.

Dinner in our house has to be hearty, meatless, nutrient rich, and, of course, delicious. Oh yeah, and to make things more complicated, I'm a vegetarian because I don't like the taste of meat, which means no meat "substitutes" for us.

So what the heck do I make? Well, I can tell you that my two must-have staples in our house are beans and peanut butter. Nutrient power-houses that are also DELICIOUS.

Here are some of my go-to recipies:
1. Peanut Butter Stir Fry


2. Quesadilla Casserole


Thursday, February 24, 2011

The art of mail

I love mail.  Everyday one of my biggest highlights is collecting the mail.  I call it the post box and it is the second love of my life.  Since graduating college and getting out on my own I realized sometimes a lot of mail is not the best thing.  Bills are not so much fun but getting a letter from a friend, a birthday card, a freebie coupon can really make a bad day GREAT.  

In today's technology driven world people email way too much.  There is a lot of talk of people wasting hours each day going through their emails.  One of the ways the experts say to stop this is to not send as many emails out.  Apparently there is some figure, which I do not know off the top of my head, about the correlation of emails sent out vs. emails received.  Basically the more you send the more receive.  This may not be a good thing for emails but mail BRING IT ON.

My philosophy is the more you send (cards, letters, packages) the more you get and therefore the greatness of getting mail.  There are so many companies and websites available now to help you do this.  I recently stumbled upon a new one via a recommendation from a friend and let me tell you it is a winner. 

You have to go to TinyPrints.

Why is this site so much better than the rest?
1.  They do everything for you: You go to the website and search the cards by holiday or occasion.  Pick the card you want and then they customize it for you.  You can add photos.  You can personalize it with names. The whole process is very easy.  Finally, when you are all done they will address the envelope, add a stamp and mail the card right off to the recipient.  You can even schedule mailings in advance.  For example, once a month you can log on and buy all of the cards needed for the month - if you have a birthday at the end of the month just schedule that card to be mailed out near the end of the month even though you are doing all of the work on the first of the month. 

2. Prices: Each card is $3.99.  After a recent trip to Wal-Mart I think this is a steal.  The Wal-Mart cards were all $4 plus dollars and they stunk. They looked cheap and were cheesy.  Now if you think $3.99 is too much for a card I will tell you that TinyPrints has sales all of the time.  I recently used a buy one, get one deal on birthday cards to get all my March birthdays done.  The also have memberships which lower the price of cards to as low as $1.99 each.  There are fees associated with the memberships but they are waived the first year and very reasonable.  On the website they spell out how many cards a year you have to buy to make it worth the fee.  It's not that many!

3. Creativity: The cards are adorable!  Enough said.

Anyway, this is my new obsession.  I think this last week I have lost about 2 hours of my life looking at cards and adding them to my favorite list.  I cannot wait till April rolls around so I can start sending out more cards!

Wednesday, February 23, 2011

Purely decadence


Sometimes we have breakfast for dinner because eggs are the only thing in the refrigerator.

Sometimes I don't feel like creating a whole magnificent menu for a random Wednesday.

Sometimes it is the fastest thing I can get on the table.

This meal was for none of those reasons. 

I was craving French toast the other day about two weeks ago.  Mr. J loves big breakfasts but that is normally eggs or omelettes.  He does not think that pancakes or French toast is filling enough.  Thus, I was surprised when he was excited about the idea of French toast for dinner.  We already had plans for dinner the next two nights but I made a mental note.  I was going to have French toast soon.  If Mr. J put up a fight I was going to remind him of our little conversation. 

Fast forward a few days and this recipe for Pioneer Woman's baked French toast came to my attention.  Perfect.  Make in advance, quick meal of something I truly, deeply, madly needed to have.

Cinnamon Baked French Toast

Recipe adapted from The Pioneer Woman
Taken and adapted from Two Peas and Their Pod

Ingredients:
1 loaf French Bread
8 large eggs
2 cups milk
1/2 cups granulated sugar
2 tablespoons vanilla extract
Streusel Topping:
½ cup all-purpose flour
½ cup brown sugar
1 teaspoon cinnamon
¼ teaspoon salt
1/2 cup cold butter, cut into pieces
Maple syrup-for serving

1. Spray a 9 x 13-inch baking pan with cooking spray. Tear French bread into chunks, or cut into cubes, and evenly place in the pan.


2. In a large bowl, mix together eggs, milk, cream, sugar, and vanilla extract. Pour evenly over bread. Cover pan with saran wrap and store in the refrigerator for several hours or overnight.

3. In a separate bowl, mix together flour, brown sugar, cinnamon, and salt. Add butter pieces and cut into the dry mixture using a fork or your hands. Combine until the mixture resembles sand with a few pea sized chunks. Cover and store mixture in the refrigerator.


4. When you’re ready to bake the French toast, preheat oven to 350 degrees. Remove casserole from refrigerator and sprinkle crumb mixture over the top. Bake for 45-55 minutes, or until the French toast is set and golden brown.


5. Serve warm with butter and maple syrup.
Serves 16

I didn't notice that it served 16 till after it was in the oven.  I also tried to remain in denial about how sweet this dish was actually going to be.  I cut the sugar from the original recipe hoping that would help.  However, about half way through the baking time I knew we were screwed.  It smelled like sweet cinnamon goodness.  I was in heaven.  Mr. J decided we needed some bacon to cut back on the sweetness of the dish.  Then he dumped maple syrup on his plate.  Silly boy!
We had plenty of leftovers for breakfast the next morning!  Can I tag a post with Breakfast, Dinner and Dessert all at once?


Tuesday, February 22, 2011

A lesson in temptation: the Compost cookie


I recall promising some more healthy savory recipes a few days ago.  Who was I kidding?  That trend didn't last too long. This is the last cookie recipe for the week.  My tummy needs a break.  I just couldn't help myself with this recipe though.  It is fabulous.  See when I lived in NY I used to watch this show from 5-6pm while I was at the gym.  It was a hodgepodge of topics kind of like the last hours of the Today show but all about NYC.  At the end of each episode there was always a cooking segment.  Many times they would invite a local chef from some Hot Spot in NYC.  The Milk Bar pastry chef made many appearances.  Everything always looked good but a bit crazy too.  I never attempted any of the recipes till now.  I occasionally read The Amateur Gourmet.  During his year end recap he mentioned these cookies.  In my current cookie obsession, I knew I had to give them a try.

The Momofuku Milk Bar Compost Cookie
original recipe by Christina Tosi
(Courtesy of Regis & Kelly's website)
I modified it slightly

Ingredients:
1 cup butter (that's two sticks, unsalted)
1 cup granulated sugar
3/4 cup light brown sugar
1 tsp vanilla extract
2 large eggs
1 3/4 cups all purpose flour
2 tsp baking powder
1 tsp baking soda
2 tsp salt
1 cup your favorite baking ingredients (options: chocolate chips, Raisenettes, Rollos, Cocoa Krispies)
1 1/2 cups your favorite snack foods (chips, pretzels, etc.)


Directions:
1. In a stand mixer with the paddle attachment, cream butter, sugars and corn syrup on medium high for two to three minutes until fluffy and pale yellow in color. Scrape down the sides with a spatula.


2. On a lower speed, add eggs and vanilla to incorporate. Increase mixing speed to medium-high and start a timer for 10 minutes. During this time the sugar granules will fully dissolve, the mixture will become an almost pale white color and your creamed mixture will double in size.


3. When time is up, on a lower speed, add the flour, baking powder, baking soda and salt. Mix 45 - 60 seconds just until your dough comes together and all remnants of dry ingredients have incorporated. Do not walk away from your mixer during this time or you will risk over mixing the dough. Scrape down the sides of the mixing bowl with a spatula.


4. On the same low speed, add in the hodgepodge of your favorite baking ingredients and mix for 30 - 45 seconds until they evenly mix into the dough. Add in your favorite snack foods last, paddling again on low speed until they are just incorporated.

5. Portion cookie dough onto a lined sheet pan.


6. Wrap scooped cookie dough tightly with plastic wrap and refrigerate for a minimum of one hour or up to 1 week. DO NOT BAKE your cookies from room temperature or they will not hold their shape.

7. Heat the oven to 400 F. Take the plastic off your cookies and bake 9 to 11 minutes. While in the oven, the cookies will puff, crackle and spread.

8. At 9 minutes, the cookies should be browned on the edges and just beginning to brown towards the center. Leave the cookies in the oven for the additional minutes if these colors don't match up and your cookies still seem pale and doughy on the surface.

9. Cool the cookies completely on the sheet pan before transferring to a plate or an airtight container or tin for storage. At room temp, they'll keep five days.

Having these cookies cool in front of you is the ultimate test in resistance.  Mr. J had to leave for about 20 minutes in order to keep his mind off of the cookies.  I have heard from several people they taste like a Take 5.  I have never had one of these candy bars but these cookies are out of this world.

Monday, February 21, 2011

Restaurant Review: Caseus

It seems like a very long time since I have gone out to a restaurant which has been blog-worthy.  Let's face it.  It is never cool to whip out your camera to snap pictures of your dinner on a work trip.  Plus it has been cold and snowy - those days takeout places rule.   But this past week brought temperatures into the high 50s.  I loved it.  Snow melted.  We need some more of those days.  The warmth brought me out of hibernation mode and into celebration mode.  I don't know what we were celebrating but off we went into New Haven.


This is the second time I have been to Caseus.  When we first moved here, before New York, I was told about Caseus from a co-work who frequents the cheese shop.  As soon as I heard I was off to visit for lunch and a cheese purchase.  Sadly, shortly after that visit we moved and I have yet to be back until now.  It is in New Haven and sometimes it is hard for me to muster up the courage to venture into the big city.  I am a country girl at heart.  But time has come though and thank goodness it did.

They have a pretty impressive beer list according to Jordan. I had the house red.  True to the French culture they set out a shot glass size water glass.  Thank goodness they also give you the bottle.  We easily went through two bottles but our lovely waiter was quick to replenish. 


Mr. J's favorite part is the mini pickles they leave on the table.  He has some funny name for them but I refer to them as cornichons.

Since this was a celebration he was adamant about getting an appetizer.  I didn't need much convincing.  We ended up with a serving of poutine.  You see this in Maine all of the time and I kind of think it is disgusting.  The basic recipe is a pile of fries topped with heavy gravy, cheese optional.  A perfect dish to fatten you up to survive the long cold winters of Maine and Canada.  I am not a huge fan of gravy to begin with but the gravy at Caseus was so flavorful but light.  They also had a layer of Delicious cheese curd at the bottom.  The fries were very lightly salted and then gravy and cheese added texture and flavor that was a bit different with each bit depending on the combination and ratio of gravy, cheese, and fries.

POUTINE
CHEESE CURDS, POMMES FRITES,
VELOUTE

Can you guess which meal Mr. J ordered?  When he ordered the waiter pointed out that both the poutine and steak frites came with quite large portions of fries.  I couldn't help but laugh out loud.  He ended up taking the fries of his entree home.

STEAK FRITES
¾ lb PAINTED HILLS GRASS FED SKIRT,
HOUSE MAYO, POM MES FRITES
SAUCE ROBERT

I had the Mac and Cheese, no extra meat added.  It came with a very simple green salad. It was so rich and so good.  The pasta was the little ear pasta, Orecchiette. It is perfect for leaving lots of nooks for the cheese to hide in.   I could only eat half of it.  

MAC & CHEESE
RACLETTE, GOUDA, BECHAMEL,
COMTE, MORE CHEESE, BRIOCHE
CRUMBS, MIXED GREENS

There were about 5 other dishes we love to have.  These are our favorites.  Most of there meals, especially for lunch are pretty simple and basic.  Don't let this fool you though, they are extraordinarily well prepared and delicious.  Each night at dinner they have specials which make you drool.  

Location:
93 Whitney Avenue
New Haven, CT 06510
Website: http://caseusnewhaven.com/

Sunday, February 20, 2011

Taxes are done!

Our taxes are finally done, almost.  NY state taxes stink.  Enough said.

That was about all I got done this weekend.

It was cold and this is what hit the spot.


Weekly Workout Wrap up
Monday: Walk 5 minutes, run 5 minutes/walk 2 for 40 minutes, walk 15 minutes
Tuesday: walk 5 minutes, run 10 minutes, walk 10 minutes, bike 30 minutes
Wednesday: 60 minutes elliptical
Thursday: Walk 5 minutes, run 5 minutes/walk 1 for 40 minutes, walk 15 minutes
Friday: 60 minutes elliptical
Saturday: walk 5 minutes, run 3 miles, run 10 minutes
Sunday: walk 10, run 4 miles, walk 10

Saturday, February 19, 2011

To my Hubby: Stuffed Peppers

This week I came home to this dinner.  It was delicious, everything a girl could ask for.  He may not be the best with the camera, but he sure can make a mean dinner.


Stuffed Peppers

Ingredients:
3 green peppers, cut in half and seeded
3/4 LB ground beef
1/2 large onion, diced
3 cloves garlic, minced
1/2 C feta cheese, crumbled
2 servings, wild rice (cooked according to package directions)
salt
pepper

Directions:
1. Heat oven to 375 degrees.  Saute meat in sauce pan till cooked through. Set aside in medium bowl.
2. In same pan saute onions until translecent, then add garlic till just cooked.
3. Mix onions together with meat and cooked wild rice.   Stir in 1/4 C feta cheese.  Season with salt and pepper.
4.  Line cookie sheet with tin foil.  Place the 6 halves of green peppers.
5.  Fill peppers with meat, onions, and rice mixture.  Top with remaining feta cheese.
6.  Bake for 30 minutes.  You will  be able to smell the green peppers roasting. If you like the pepper portion very soft cook for 45 minutes to an hour. 


Friday, February 18, 2011

Brownie delights

I found a cookbook I knew I had but somehow forgot about. 

Thanks Amazon for the fabulous picture.

I got this as a gift from my dad on a trip to Boston when I was still in high school.  We were at a famous bookstore by Harvard.  Yes, I do remember in great detail eacha and every one of gifts I recieve.

On Monday morning, when I had the great idea of making brownie sundaes for Valentine's Day I pulled it out for some fabulous brownies.  I mean, you cannot really go wrong with ghirardelli right?


Ghiradelli Brownies
Adapted from The Ghiradelli Chocolate Cookbook
Ingredients:
 2 large eggs

3/4 cup granular sugar
1 teaspoon pure vanilla extract
1/2 cup unsalted butter, melted
3/4 cup Ghirardelli Sweet Ground Chocolate & Cocoa (Dutch processed cocoa)
2/3 cup all-purpose flour, unsifted
1/4 teaspoon baking powder
1/4 teaspoon salt
1 cup bittersweet or semi-sweet chocolate chips

Directions:
1. Preheat oven to 350 degrees F.
2. Using a wooden spoon whisk together eggs, sugar, butter and vanilla.


3. In another bowl, combine flour, cocoa, baking powder and salt.


4. Stir flour mixture into egg mixture.Stir until thick and glossy.


5. Add chocolate chips. Combine well.
6. Spread into a greased 8- or 9-inch square pan.


7. Bake for 20 minutes and then let cool on rack.
8. Cut into squares.
Makes 16-20 brownies.

These brownies are very rich.  Although it is not essential to use Ghiradelli cocoa powder it is important to use a high quality cocoa.  I always heard chefs on TV use this term "high quality" and thought they were a bit snotty but in reality bad cocoa makes whatever you are making not that great.  Use the good stuff!

On a side note: Jordan and I bought our plane tickets to San Fran a few weeks ago.  I cannot wait.  We were a bit disappointed though to learn that the Ghiradelli factory is not really in San Fran, just the square with the ice cream and chocolate shop.

Have you been to San Fran?  Any suggestions?

Thursday, February 17, 2011

I think I have a problem

I thought it was cookies, then I replaced cookies with bagels for a few days.

But now it is brownies and chocolate.  Honestly I do not know what has happened to me. I used to be the model of restraint.  It has all gone out the window.  I should blame Valentine's Day and all of the chocolate and pink postings.  They made me have cravings. 


Hot Fudge Sauce

Ingredients:
1/2 c. sugar
3 tabls. cocoa
1 1/2 Tbsp cornstarch
dash salt
1/2 c. water, room temperature
2 tabls. butter or margarine
1 teas. vanilla

Directiions:
Mix the 4 dry ingredients in a 2 cup measuring cup or glass bowl.
Stir in the water.
Cook on full power for 2 min. stirring half way through. Blend in the butter.
Cook 1 minute stirring half way til butter is melted.
Blend in vanilla.
Cook and stir every 30 seconds until it thickens as you like!


With an addiction like the one I am currently in they should really make these things harder to make.


Yum! Can I have another please?

You might also like reading:

Related Posts Plugin for WordPress, Blogger...