Showing posts with label Candy. Show all posts

Monday, January 18, 2016

My Favorite M&M Cookies


How is it already half way through January?  I still haven't written my end of year wrap up and truth be told my motivation is dwindling with every day.  Christmas came with a flourish of activity and visitors. New Year's was super low key by comparison.  Mr. J, Miss O, and I lazily watched TV, movies and ate whatever was around. We weren't rushing to finish a house project or prepare for the holidays or really have any thing to do. It was wonderful.

I think the lack of obligations took over from then on and here we are on January 18th as my first post of the new year. That and we all got massively ill. Miss O actually fared the best of all of us.  But sickness can no longer be an excuse for my lack of posting.  I actually have about 4 half written posts.  I just don't seem to have the motivation or the time to finish them. Bed time comes fast around here.


Of course cookies can change all of that.  I made these cookies last weekend and instantly knew I had to post about them.  They are my favorite. I love M&M cookies. They always seem a bit more special to me than the old faithful chocolate chip.  All of the different colors instantly make me happy. And these taste amazing to boot.  Plus they are super simple and can be put together on the most hectic of days. 

So I promise to post a bit more frequently. And to do my year end wrap up. And eat a few more of these cookies. Promise.


My Favorite M&M Cookies

by Emily Morris
Prep Time: 15 minutes
Cook Time: 10 minutes
Keywords: bake dessert cookie
Ingredients (12-15 cookies)
  • 8 tablespoons of salted butter
  • ½ cup white sugar
  • ¼ cup packed light brown sugar
  • 1 teaspoon vanilla
  • 1 egg
  • 1½ cups all purpose flour
  • ½ teaspoon baking soda
  • ½ teaspoon salt
  • ¾ cup M&Ms
Instructions
Preheat the oven to 350 degrees.

In a microwave safe bowl, melt the butter until just liquid, around 30 seconds. You can take the butter out when there is still a few solid chucks. Gently swish the bowl until it is completely melted.

Using a stand mixer or electric beaters, beat the butter with the sugars until creamy. Add the vanilla and the egg; beat on low speed until just incorporated.

Add the flour, baking soda, and salt. Mix until a ball of dough forms.

M and Ms and incorporate with your hands.

Roll the dough into 12 large dough balls and place on a cookie sheet. Bake for 9-11 minutes until the cookies look puffy and dry and just barely golden. Take them out even if they look like they're not done yet. Let them cool on the pan, as they will continue to cook.
Powered by Recipage

Saturday, November 21, 2015

Chewy Butterfinger Chocolate Chip Cookies #thebookclubcookbookCC

One of the things I miss the most since Miss O was born is my ability to put my feet up and read.  When I was traveling a lot with work I had a lot of time to read on my flights and layovers. I also would take time on the weekends and snuggle up on the couch to engage myself in a new world through a wide variety of genres. Having a baby means almost no free time. Or at least my priorities have changed a bit. My free time is now spent playing and snuggling a baby. I miss reading but for the time being I am OK with my limited book time. 


That doesn't mean however that I cannot enjoy a good book. As part of my monthly Book Club Cook Book contribution this month I dove into Harry Potter and the Sorcerer's Stone. Erin of The Spiffy Cookie, hosted this month and I could not have been more pleased with her pick. If you are interested in joining see this post from Camilla, our leader.  There is a giveaway at the bottom of this post for The Book Club Cook Book so keep reading. 


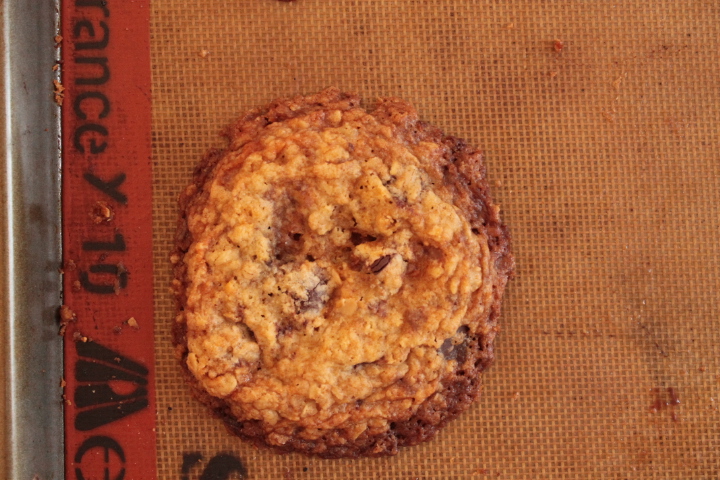
This is my second time reading this book but the first time was way long ago, dare I even say when I was in high school. Before I even opened the pages I was pretty sure I wanted to make ButterBeer. Turns out though that this doesn't come up in the series till much later. The other thing I kept turning to was the scene in the movie right before the troll storms the castle. The characters are feasting in this marvelous hall with all sorts of goodies floating around. As I was reading the book and thinking of a potential recipe, this imagine was stuck in my mind. I think of it as the most massive and decadent Thanksgiving feast. It may have been because we had just celebrated Halloween but my massive and decadent feast turned into very indulgent cookies. Cookies which included rice crispy cereal, Butterfinger candy and chocolate chips. Did I mention these cookies were gigantic? 


I believe my Chewy Butterfinger Chocolate Chip Cookies would fit right in with the desserts offered at Hogwarts.

Chewy Butterfinger Chocolate Chip Cookies

by Emily Morris
Prep Time: 15 minutes
Cook Time: 12 minutes
Ingredients (makes large 15 cookies)
  • 1 cup all-purpose flour
  • 1/2 teaspoon baking powder
  • 1/2 teaspoon baking soda
  • 1/4 teaspoon salt
  • 1/2 cup unsalted butter, at room temperature
  • 1/2 cup granulated sugar
  • 1/2 cup light brown sugar
  • 1 large egg
  • 1 teaspoon vanilla extract
  • 1 cup old fashioned rolled oats
  • 1 ¼ cups Rice Krispies cereal
  • 1 cup chocolate chips
  • 1 cup chopped Butterfinger candy bars
Instructions
Preheat the oven to 375 degrees F. Line a baking sheet with a silicone baking mat and set aside.

In a medium bowl, whisk together the flour, baking powder, baking soda, and salt.
Combine butter and sugars in the bowl of a stand mixer. Beat until smooth and creamy, about two minutes. On low, add in egg and vanilla extract. Beat until combined.

Slowly add in the dry ingredients until mixed together.

Fold in the oats, cereal, chocolate chips, and Butterfinger pieces by hand. Don’t over mix.

Scoop dough into balls, about a tablespoon each, and place on prepared baking sheet. 

Bake cookies for 10-12 minutes, or until edges are slightly brown, the centers should still be soft.

Allow cookies to cool for 2-3 minutes on the baking sheet. Move cookies to a cooling rack and cool completely.
Powered by Recipage

And be sure to check out some of the other bloggers joining in on the fun. 


Cheese Curd In Paradise               
Life on Food       
The Pajama Chef              
The Spiffy Cookie             
Things I Make (for Dinner)           
Tortillas and Honey         
ZooeySuff   

You can follow along with the hashtag #thebookclubcookbookCC on social media or check out the group Pinterest board. Find out how you can join along with us below.


Giveaway
This month Erin at The Spiffy Cookie, this month's host, is giving away a copy of the book.* Enter to win a copy of the cookbook so you can join us in future months, if you wish!

One of our lucky readers - US and Canada only! - can enter to win a copy ofThe Book Club Cookbook, Revised Edition: Recipes and Food for Thought from Your Book Club's Favorite Books and Authors by Judy Gelman and Vicki Levy Krupp, courtesy of Tarcher-Penguin. Giveaway runs from November 1st till November 30th at 4 o'clock PM, Pacific time. Please see terms and conditions in the rafflecopter widget below. Many thanks to Tarcher Books. You may find Tarcher: on the web, on Facebook, on Twitter, and on Pinterest.

a Rafflecopter giveaway
*Disclosure: Erin received a complimentary copy of The Book Club Cookbook, Revised Edition: Recipes and Food for Thought from Your Book Club's Favorite Books and Authors by Judy Gelman and Vicki Levy Krupp as an opportunity to give a copy away. Opinions are our own. We received no further compensation for our posts.

Monday, February 23, 2015

Pis­ta­chio Dark Choco­late Tof­fee {SRC}


I am kind of sad that it is time for the February Secret Recipe Club posting. I am taking next month off with the pending arrival of our baby.  I look forward to each new assignment and having a month without a posting will be weird. Of course if baby Morris makes her appearance as planned I am sure I will have other distractions. 


If you didn't know the Secret Recipe club is a group of bloggers that each month are assigned a "secret" blog. We then pick and make a recipe for the monthly posting.   This month I had Nicole of Hapa-tite.  If you were wondering about the blog name, I was, Nicole gave a nice definition that really sums up her blog.


ha•pa (hä’pä) adj. 1. Slang. Of mixed racial her­itage with par­tial roots in Asian and/or Pacific Islander ances­try. n. 2.Slang. A per­son of such ancestry.


Hapa-tite is a com­bi­na­tion of two words: hapa and appetite. I think that it encom­passes my appetite for all things food-related in life: restau­rants, recipes, o-bento, cook­books, tea, and cock­tails (as well as web-design and blogging).


There are many interesting posts and you are in for a treat if you like teas and cocktails. I am not a huge drinker and cocktails aren't really look well upon for a 9 month pregnant lady so I stuck to the food. I was eyeing the pistachio dark chocolate toffee and the banana pudding cupcakes.  Since I had just made some banana bread granola I went with the toffee. Plus I haven't made toffee before so I took a bit of an adventure. 


Pistachio Dark Chocolate Toffee

by Emily Morris
Prep Time: 5 minutes
Cook Time: 20 minutes
Keywords: dessert chocolate pistachios candy
Ingredients (serves 4)
  • 1/2 cup unsalted butter
  • 1/2 cup sugar
  • ¼ cup water
  • 1/4 teaspoon salt
  • 4 ounces chocolate chips, 1/2 cup
  • 1/2 cup pistachios
Instructions

Have a ungreased jelly roll pan ready near the stove.

In a saucepan, combine butter, sugar, water, and salt. Whisk constantly until it reaches 300°F. The color should be a medium caramel brown.

Pour immediately on the pan.

While the sugar layer cools, melt the choco­late in a dou­ble boiler. Once the choco­late is smooth and shiny, pour over the now-cooled sugar, using an off­set spat­ula to dis­trib­ute evenly.

While the chocolate is still melted, sprin­kle with the pistachios. Gen­tly press the nuts into the chocolate.

Let toffee stand 2-3 hours at room temperature or chill 30 minutes until firm.

Using a knife, break into bite-size pieces. Package in small bags for gifts or a tin for yourself.
Powered by Recipage


Monday, May 19, 2014

Butterfinger Brownies


My Reese Peanut Butter Cup brownies went over well last week.  You guys loved them and well Mr. J ate them us so quickly our weekly dessert lasted about two days. 


It got me thinking about other candy/brownie combinations I could use to make a decadent dessert.  Butterfingers popped into my mind. I don't tend to eat candy bars and to tell you the truth Butterfinger would not be my first pick.  Funny though that when it comes to ice cream toppings Butterfingers are my favorite.  A Butterfinger Blizzard. Check.  Butterfingers on frozen yogurt. Yes, please.


When I think of Butterfingers I think of Bart Simpson. My brother was a huge fan of The Simpsons growing up. It was a nightly tradition.  The Halloween episode brought the whole family together. Do you remember the commercials with Bart Simpson?

"Nobody better lay a finger on my Butterfinger."

Remember?


Yep, that is all I can think about. I think the same goes for these brownies. I made them Saturday afternoon and then had to leave last night for a work trip.  I am coming home later tonight. I am pretty sure that brownies might be gone when I come home.


Butterfinger Brownies

by Emily Morris
Prep Time: 15 minutes
Cook Time: 45 minutes
Keywords: bake brownies
Ingredients (serves 9)
  • 1 box store bought brownies or your favorite brownie recipe
  • 1 cup Butterfinger bites, chopped and divided
Instructions
Preheat over to 325 degrees. Grease a 8x8 baking dish and set aside.
Make brownies according to box instructions. Fold in 1/2 cup of roughly chopped Butterfingers.

Put mixture in prepared pan.Sprinkle remaining Butterfinger pieces on top of batter.

Bake for 40-45 minutes until edges are set and the middle is not longer jiggly. Cool completely before slicing.
Powered by Recipage

Monday, October 7, 2013

Oreo Monster Bars #chocolateparty

Can you believe we are already well into October? I haven't even made my first pumpkin recipe yet. Before you know it Thanksgiving will be here.  My head is spinning. I am doing my best to slow down and just enjoy today.  Too bad my days go by so fast.


With all of the house hustle and bustle I was a little late with my chocolate party treat. In fact, I made these Oreo Monster Bars yesterday.  I was happy to make them though. They were needed after a long weekend of house work. And although we had other desserts in the house, there was nothing homemade.  


These bars are loaded with chocolate chips, Oreos, and M&Ms.  A great way to clean out some of the random hodge podge of snacks in my pantry. Plus perfect for the October Chocolate Party theme of candy.  I thought about a few more candies but I didn't want to go overboard. Feel free to substitute any candies you may have laying around.


There is a sweet and sweet thing going on in these bars.  Plus, you get the creaminess from the Oreo filling. Needless to say in 24 hours the pan is half gone.


If you want to join in on the fun here is how you participate:


1.) Blog about your chocolate treat. Your recipe must include the two ingredients we choose. It can be a simple no bake treat or a sophisticated layer cake, the complexity level of the recipe is totally up to you.


2.) Include a link back to the Chocolate party page.  Optionally, add the Chocolate Party logo in your blog post or on your sidebar.


3.) Your recipe must be published during the current month. Please do not link old recipes, they will be deleted.


4.) Add the linky code at the bottom of your post.

Ingredients:

1/2 cup unsalted butter (1 stick), softened
1 large egg

3/4 cup light brown sugar, packed
1 tablespoon vanilla extract
1 cup all-purpose flour
12 Oreo Cookies, about 1 cup, coarsely chopped 

1/2 cup M&M's 
1/2 chocolate chips

Directions:

  1. Preheat oven to 350F. Line an 8-by-9 nch baking pan with aluminum foil, spray with cooking spray; set aside.
  2. In a large bowl beat the butter, about 1 minute on high power with a hand mixer.
  3. Add the egg, brown sugar, vanilla, and mix until smooth.
  4. Add the flour and stir until just combined.
  5. Stir in the Oreos, M&Ms and chocolate chips.
  6. Turn batter out into prepared pan, smoothing the top lightly with a spatula.
  7. Bake for about 20 to 25 minutes, The top should be set and edges slightly firm. 
  8. Allow bars to cool in pan before serving.


Tuesday, May 22, 2012

Jumbo Reese's Pieces Peanut Butter Cookies


I took a break from Pinterest after about a month of non-stop browsing.  I went cold turkey. No need for a 12 step program for me.  I probably would have needed one though if work had not gotten incredibly busy with non-stop travel. It is easy to quit one addiction by picking up another.  Although traveling for work is more forced. 


I digress.  Last week I ease myself back into the Pinterest world. I gave myself a 15 minute limit per day.


The first day I found these cookies from the Brown Eyed Baker.  A seed was planted. It grew to a seedling the day I supplied candy for a 3 hour presentation I was giving.  The candy contained Reese's Pieces.  Yes, I do bribe the people I am presenting to (especially CFOs) with candy. I have learned that 1pm meetings for three hours about numbers need candy.  They were happy.


I restrained myself on the flight home from eating any of the precious leftovers in order to make these cookies. I am so glad I did.

 
Jumbo Reese Pieces Peanut Butter Cookies

Adapted from Brown Eyed Baker
Prep Time: 15 minutes
Cook Time: 12 minutes


Ingredients (18 cookies)
  • 3¾ cups all-purpose flour
  • 1½ teaspoons baking soda
  • ¾ teaspoon salt
  • ½ cup coconut butter
  • ½ cup creamy peanut butter
  • 1 cup light brown sugar
  • ¾ cup granulated sugar
  • 4 eggs
  • 4 teaspoons vanilla extract
  • 1½ cups semisweet chocolate chunks
  • 1 cup Reese’s Pieces
Instructions
Preheat oven to 350 degrees F. Line two baking sheets with parchment paper; set aside.

In a medium bowl, whisk together the flour, baking soda, and salt; set aside.

With an electric mixer on medium speed, cream together the coconut butter, peanut butter, and both sugars until light and fluffy, about 3 minutes.

Scrape down the sides of the bowl, add the eggs and vanilla extract, and beat until combined. Reduce the mixer speed to low and gradually add the flour, mixing until it has almost all been incorporated. Add the chocolate chunks and Reese’s Pieces, mix briefly until just incorporated.

Use a ¼ cup scoop to get a ball of dough and place on one of the baking sheets. Repeat with the rest of the dough – you should end up with about 18 cookies. With your fingers, press down on the balls of dough to flatten into disks, about ½-inch thick.

Bake the cookies for 12 to 15 minutes, just until the edges of the cookies are beginning to turn a light brown. Cool the cookies on the baking sheets.
Powered by Recipage

Thursday, December 22, 2011

Peppermint Bark: A Tradition Which Never Ends

Yesterday was the shortest day of the year.  It was dark when I left for work in the morning and dark at night when I returned home.  I hate the dark. 

We made some super hot nachos for dinner. I had a glass of wine.  I settled in for a movie.  There was no cell phone, no email, and no internet.  Although I love blogging and checking out what everyone else is doing after a week of 10 hour work days with non-stop staring at the computer, I needed a rest. 

Thus my post today is a repeat. It's been a tradition for years now to make peppermint bark. It is a favorite of my mom.  Every year I see the stuff in stores easily going for $19.99/lb and I laugh. It is so simple to make and can easily be done with three ingredients. This year it hasn't happened yet but come Saturday this is definitely on the agenda.

Christmas bark

1 12 ox bag white chocolate chips ( the better the white chocolate the easier it is to work with)

1 tbsp peppermint extract

1 box candy canes or peppermint candy (red and white is the most festive)

1 cookie sheet


1. Unwrap all of the candy canes or peppermint candies. Put into a durable baggie, Ziploc Freezer bags work fine. Use a meat tenderizer or roller pin to break up all of the candy into small pieces.

2. Melt the white chocolate either by putting it in a double boiler and stirring constantly or my preferred method is simply dumping the bag in a microwave safe bowl. Heat for 30 second intervals stirring after each time. This method will take about 2 minutes of heating. You can stop heating when there are still a few lumps of solid chocolate left. Keep stirring and the heat will continue to be dispersed and melt the remaining chocolate. This will you will not over heat and burn the chocolate. Once you over heat white chocolate there is no saving it.

3. Stir in the peppermint extract and candy cane pieces. Spread on a clean cookie sheet and even out the thickness across the pan. Don't worry if it does not reach all of the sides. Cool until harden in the refrigerator.

4. Once hard gently twist the cookie sheet so it is not flat bottomed, this should produce cracks through the harden bark. Then use your hand to break up into desired sized pieces.

You might also like reading:

Related Posts Plugin for WordPress, Blogger...